Add a preloader or loading animation for your WordPress website. How to add this following this tutorial:
Method 1: Using a WordPress Plugin
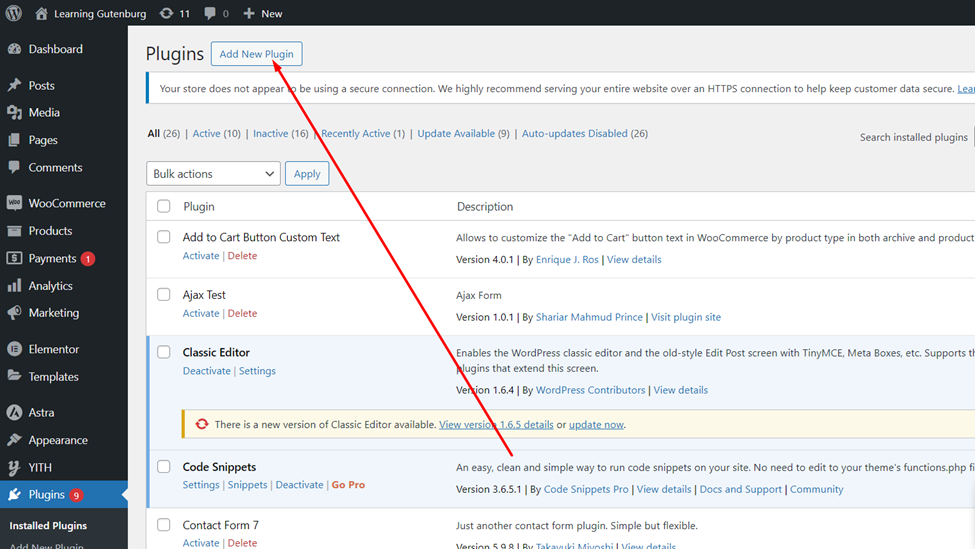
- Install and Activate a WordPress Plugin:
- Login to your WordPress dashboard.
 - Then, go to Plugins > Add New.
 
 
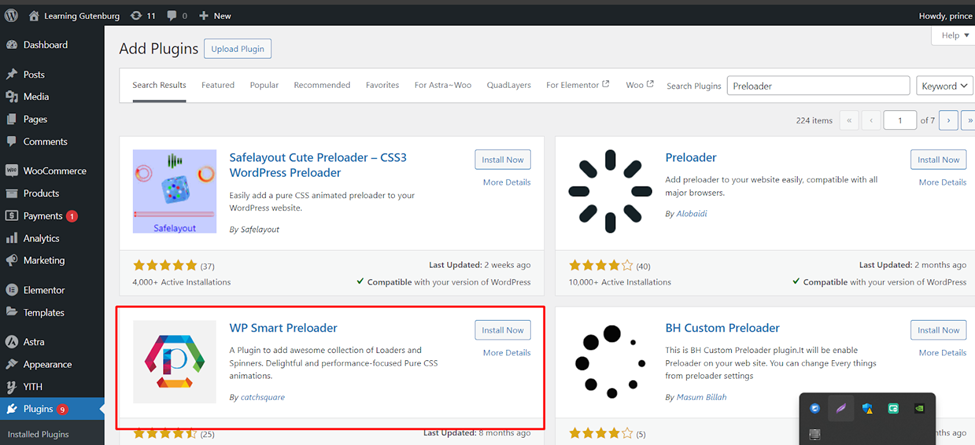
															- Search Plugin “Preloader” or “WP Smart Preloader” in the WordPress directory.
 
															- Then, activate and install this preloader plugin.
 
- Setup the  preloader WordPress plugin:
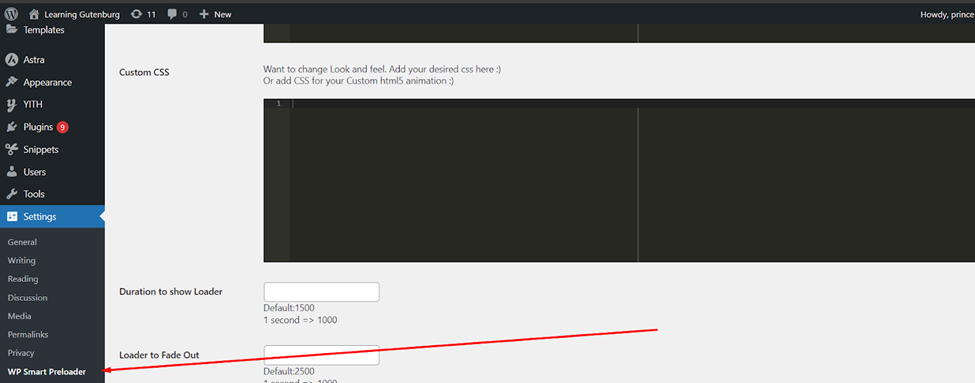
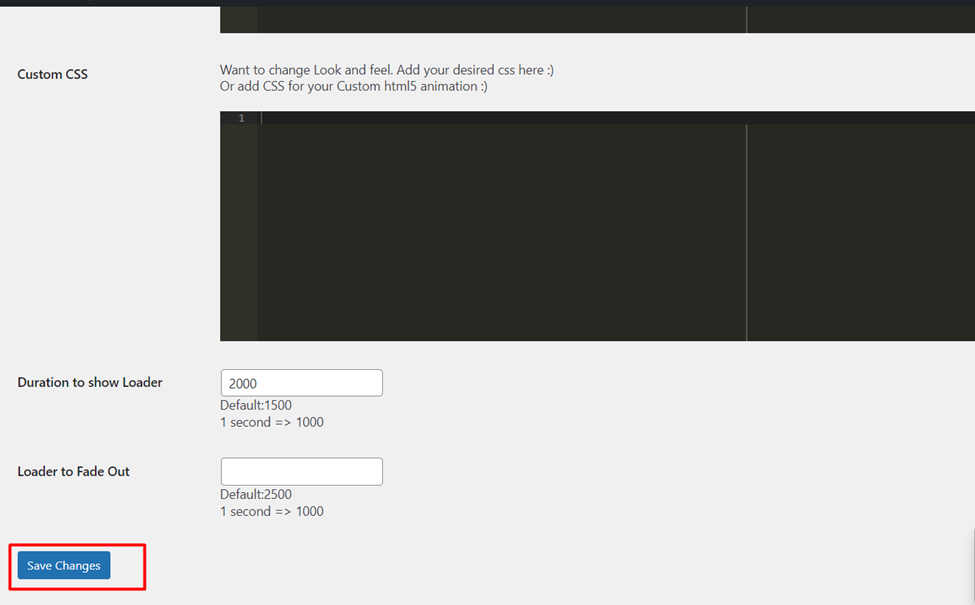
- After activating the “WP Smart Preloader” plugin, go to the plugin settings page (usually under Settings > Wp Smart Preloader or a similar section).
 
 
															- Choose an options for your perfect preloder animation or upload your custom GIF or CSS-based animation. (GIF file upload functionality is not available in this plugin.) You can use other preloader plugins.
 - You can set the delay time and choose which pages (like the home page, all pages, etc.) to show the preloader on.
 - Then click the save changes button.
 
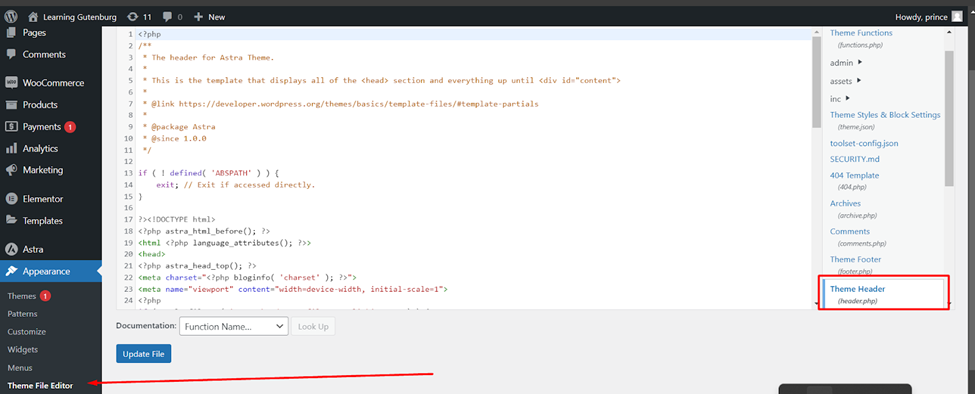
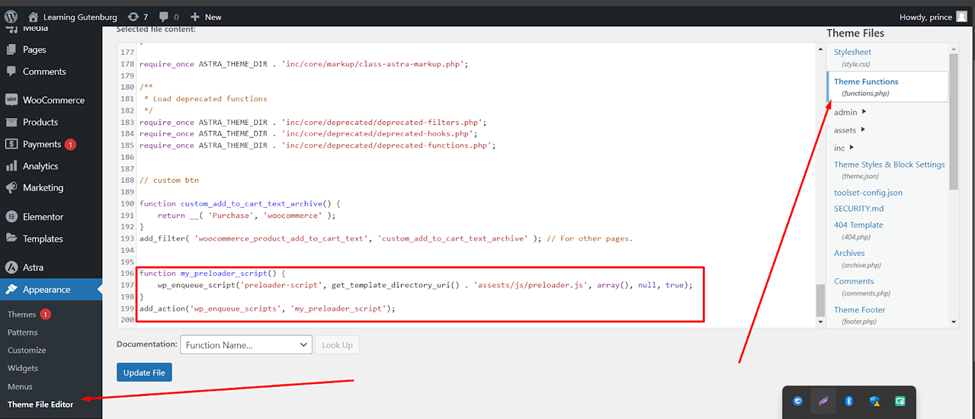
															Method 2: Using Custom Code on your WordPress website
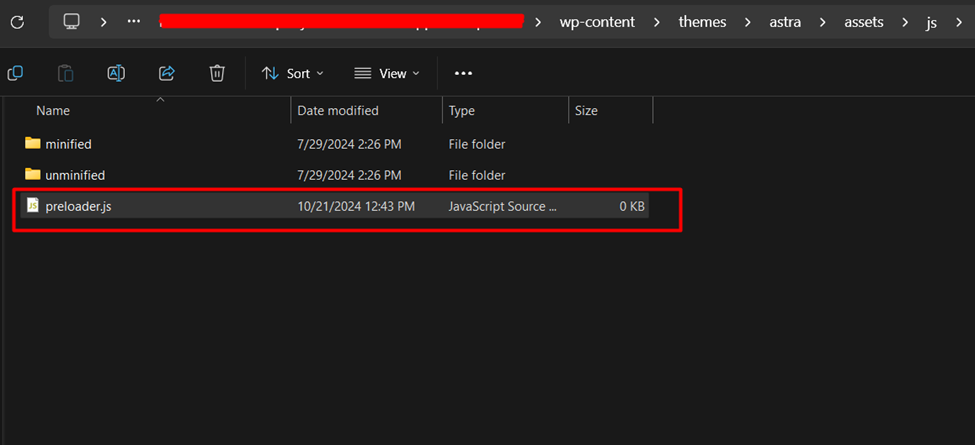
- Add the Preloader code to your theme:
- Navigate to Appearance > Theme File Editor.


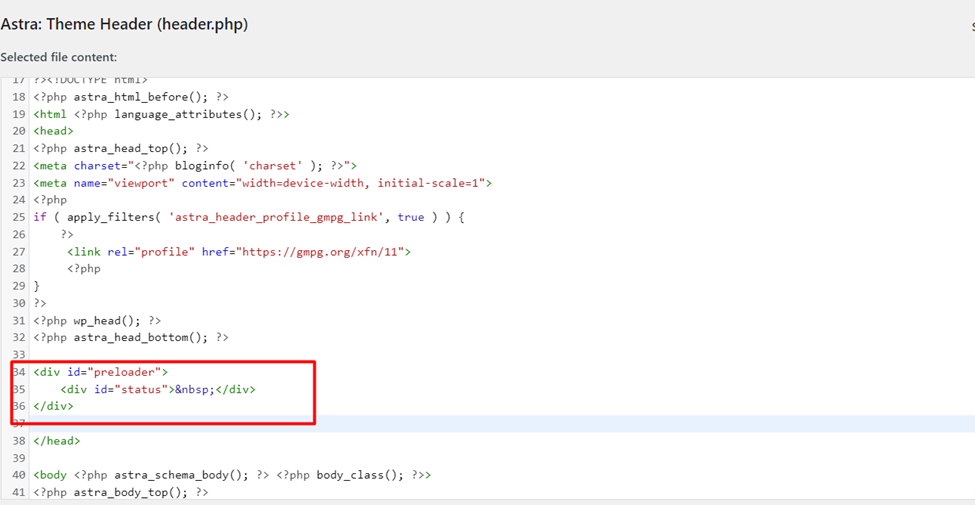
- In this active theme file, go to header.php file (or child theme’s header), and before the closing </head> tag, add this HTML and save this file:
 
<div id="preloader">
    <div id="status"> </div>
</div>
															- Add the CSS for your WordPress Preloader:
 
- Go to Appearance > Customize:
 
															- Then go to “Additional CSS” Section and add this code
 
															
#preloader {
    position: fixed;
    left: 0;
    top: 0;
    right: 0;
    bottom: 0;
    background-color: #fff; /* Preloader background color */
    z-index: 9999; /* Ensure it covers the content */
}
#status {
    border: 2px solid #f3f3f3;
    border-radius: 50%;
    border-top: 6px solid;
    width: 120px;
    height: 120px;
    -webkit-animation: spin 2s linear infinite; /* Safari */
    animation: spin 2s linear infinite;
    margin: 50vh auto;
}
															- 
Enqueue the JavaScript File to your theme ( required for preloader)
 - 
- Go to Appearance > Theme File Editor.
 - Then go to function.php file.
 
 
function my_preloader_script() {
    wp_enqueue_script('preloader-script', get_template_directory_uri() . /assets/js/preloader.js', array(), null, true);
}
add_action('wp_enqueue_scripts', 'my_preloader_script');
															- Now , create the Preloader JS File
 
- Go to your theme folder and go to /assets/js. ( access this folder by ftp , cpanel or any wp file manager plugin.)
 - Inside the theme JS folder, create a new file named preloader.js(make sure this file doesn’t already exist).
 
															- Add the following code to preloader.js 👇:
 
window.onload = function() {
    document.getElementById("preloader").style.display = "none";
}
- Save and preview and clear cache on your website:
 
- Save the changes and look at the site again. This animation should show up before the content loads.
 
Finally interface:
															With this method, you can add a simple preloader or use plugins or code to change the animation.


