Contact Form 7 is one of the most popular form plugins for WordPress website. Its default styling does not look attractive and eye-catching. That’s why we need to re-style the contact form 7 for different websites.
By following the below steps, you can add custom style in your contact form 7.
Step-by-Step guide:
- Install and activate plugin:
- Log in to your WordPress dashboard.
- Go to Plugins > Add New.
- Search for “Contact form 7”.
- Install and activate the plugin.
- Form Creation:
- You can use or import premade forms.
- Or you can create a new form with your required fields.
- Place the form in your website where you want to use the form.
- Change form style:
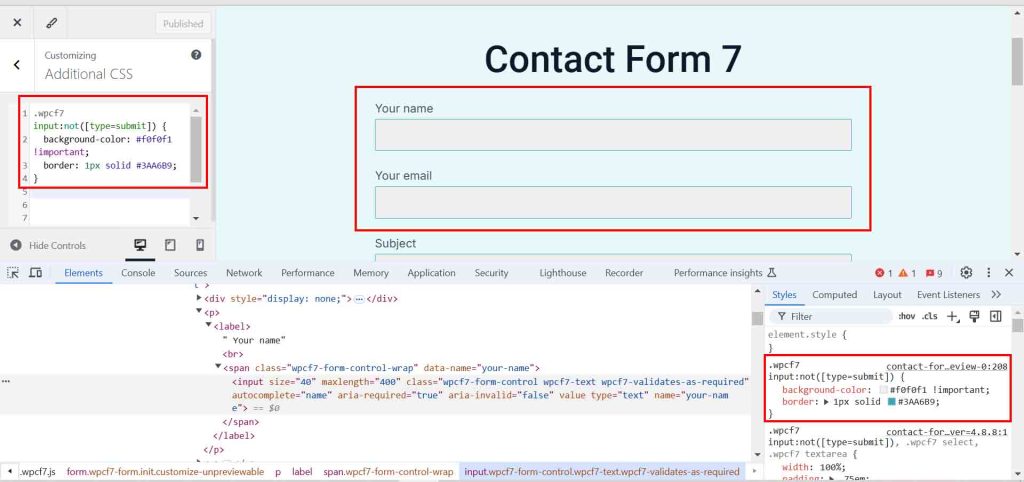
- During changing style, we can keep the css code in WordPress Dashboard> Appearance> Additional CSS.
- By inspecting forms elements, we will get the required class.
Add custom class and ID
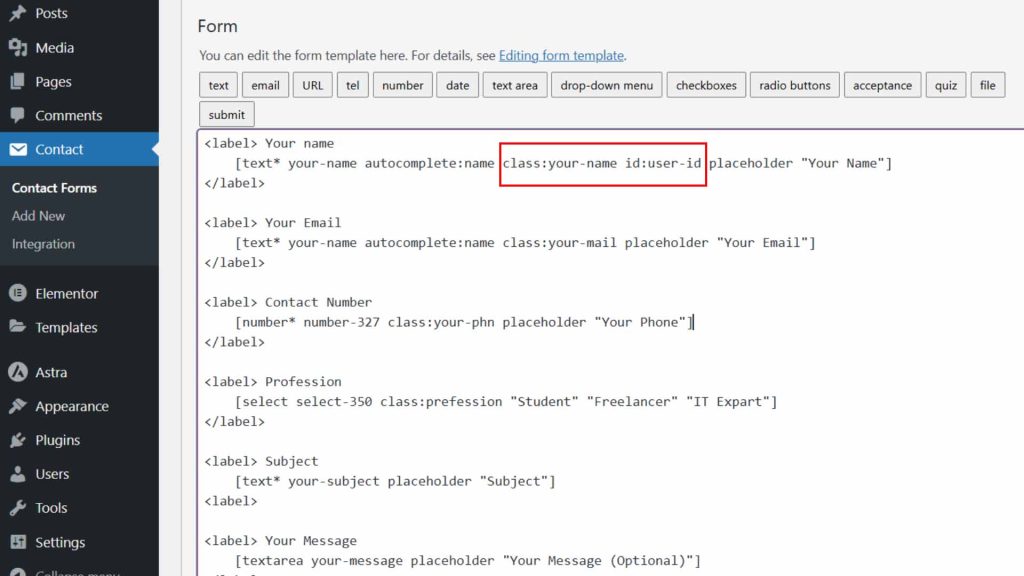
For additional styling, we can add extra class and ID in Contact form 7 input field.

For custom class and ID:
- From your WordPress dashboard.
- Go to Contact forms> All form> Edit.
- Add custom class and ID as shown in image.
- Save the changes.
Add input field style

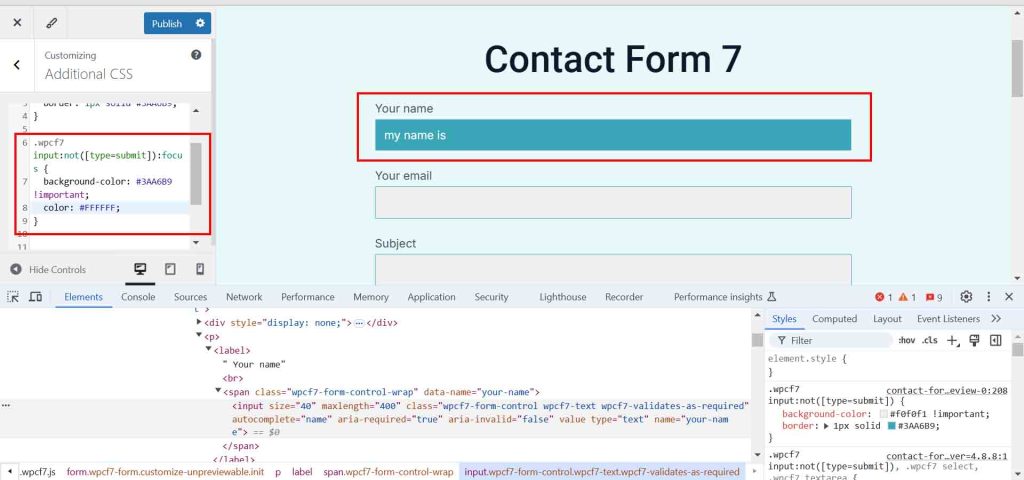
Add hover and focus effect

By adding custom class and ID, we can style differently each field.


